The process of dividing data from one column into multiple columns in Excel involves using the “Text to Columns” feature.
This function allows users to separate a single column of data into different columns based on specific criteria such as delimiter characters, fixed width, or other separators.
Here’s a step-by-step guide on how to achieve this in Excel:
- Select the Data: Begin by selecting the column that contains the data you want to split.
- Text to Columns: Navigate to the “Data” tab on the Excel ribbon.
- Choose Text to Columns: Click on “Text to Columns” within the Data Tools group.
- Select Data Type: Choose between “Delimited” or “Fixed Width” based on how your data is structured.
- Delimited: If your data is separated by a character like a comma, tab, or semicolon.
- Fixed Width: If your data has a consistent width for each field.
- Choose Delimiters (if applicable): If you select “Delimited,” specify the delimiter character used to separate the data (e.g., comma, space, or custom character).
- Column Data Format (if applicable): For “Fixed Width,” define where Excel should create new columns by clicking on the data preview or adding column breaks.
- Preview and Finish: Review the data in the preview window to ensure it’s splitting correctly. Adjust settings if needed.
- Specify Column Destination: Indicate where you want the separated data to appear – either in the existing worksheet or a new one.
- Finish: Click “Finish” to execute the separation process.
Following these steps enables you to efficiently organize and manage data by dividing it into separate columns, facilitating better analysis and manipulation within Excel.
Here’s an example of how you can use Text to Columns in Excel:
Suppose you have a column of data containing names and email addresses, like the following:

You can use Text to Columns to separate the names and email addresses into separate columns. Here’s how:
-
- Select the column containing the data you want to separate.
- Click on the Data tab in the ribbon at the top of the screen, then click on the Text to Columns button.
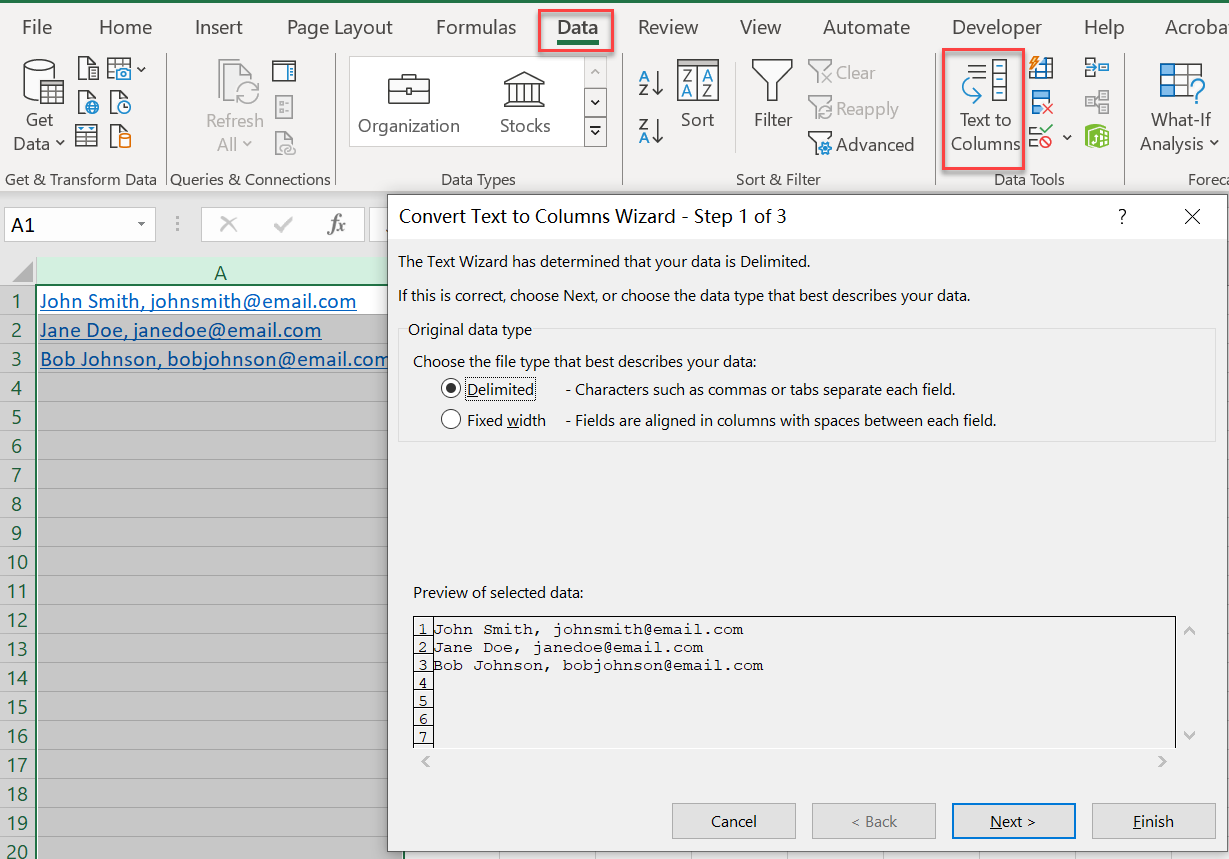

- In the Text to Columns Wizard, choose the delimiter you want to use to separate the data. In this case, we’ll use a comma as the delimiter.
- Preview how your data will look after it is split into columns. You should see a preview with two columns: one for the names and one for the email addresses. If the preview looks correct, click Finish.

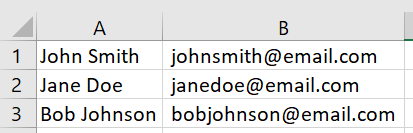
You should now see two columns with the separated data:
See also: Mastering the Linux Command Line — Your Complete Free Training Guide
Text to Columns can be extremely useful when working with large amounts of data that needs to be broken down into smaller, more manageable pieces. With these simple steps, you can quickly and easily separate data in Excel without having to resort to manual methods.