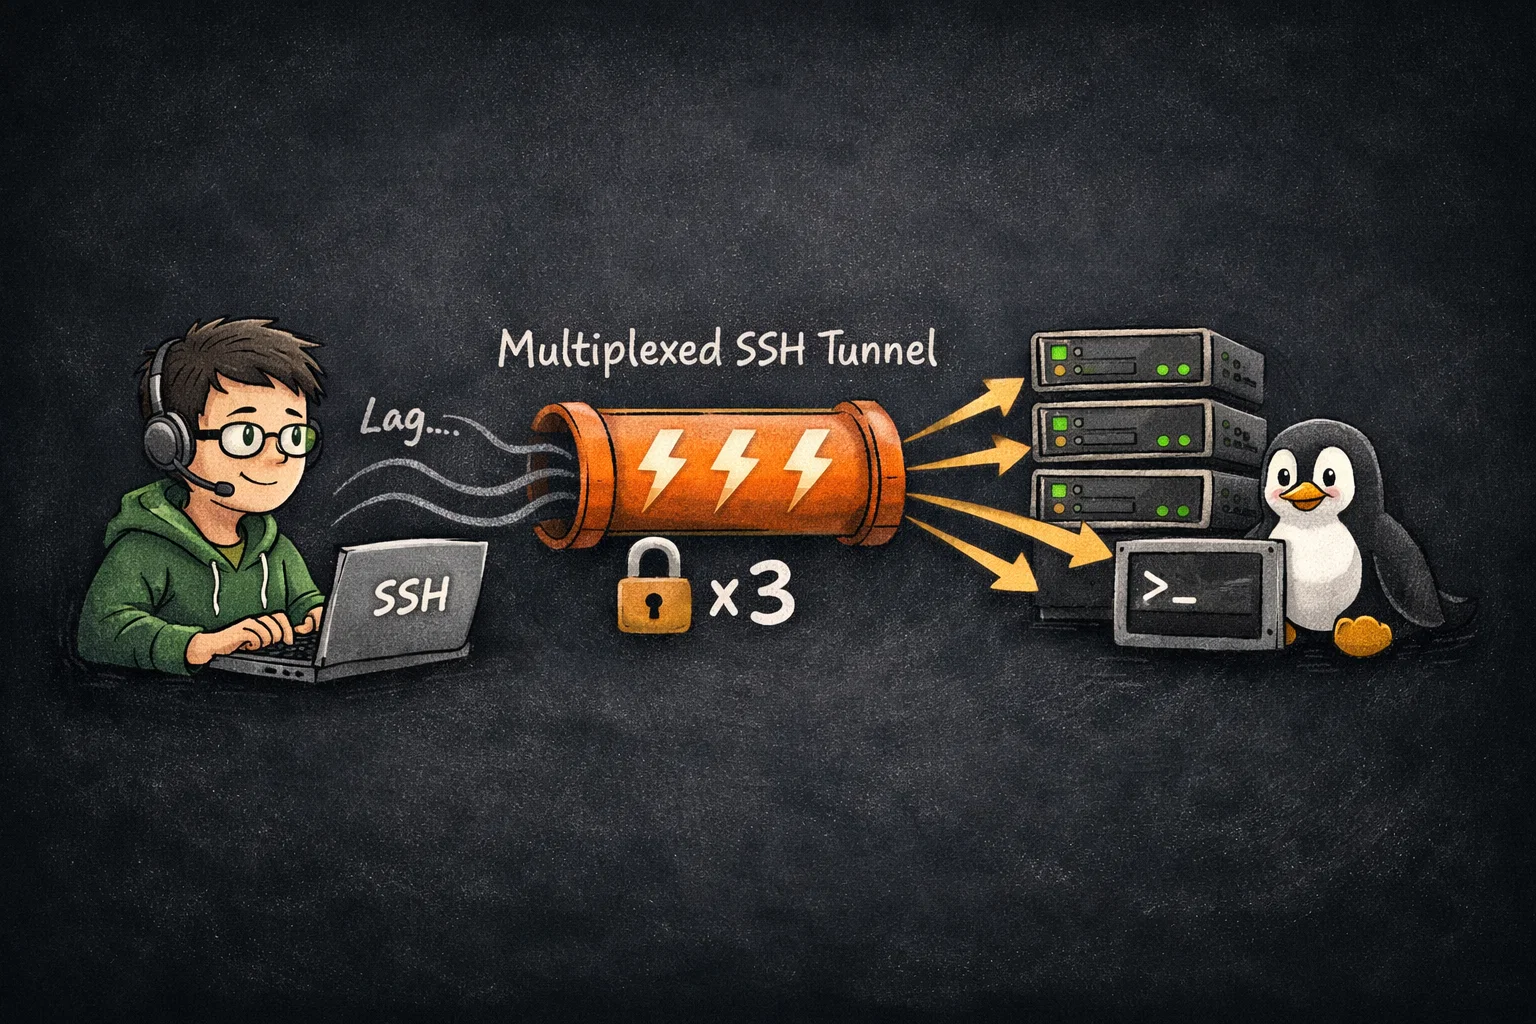
If you work with remote servers daily, you know the friction: type ssh user@server, wait for the DNS lookup, wait for the handshake, wait for authentication… and finally, you get a prompt.
This article will show you how to configure SSH Connection Multiplexing using ControlMaster. This technique allows you to reuse a single TCP connection for multiple sessions, slashing your login time from seconds to milliseconds.
Let’s dive in.
Table of Contents
What is Connection Multiplexing?
Think of standard SSH as “dialing a number” every time you want to talk. Think of Multiplexing as “keeping the line open.”
- The First Connection (Master): Establishes the secure tunnel (handshake, encryption, auth).
- Subsequent Connections (Slaves): Piggyback on that existing tunnel, skipping the setup entirely.
Hands-on Lab: Speed Up SSH in 5 Minutes
Open your terminal. We are going to benchmark your current speed, configure multiplexing, and then measure the improvement.
Step 1: Benchmark Your Current Speed
Before we optimize, let’s establish a baseline. We will use the time command to measure how long it takes to log in, run exit, and disconnect.
Run this command (replace with your actual server details):
# Syntax: time ssh <user>@<host> exit
time ssh [email protected] exit
Check the output: Look at the real or total time.
real    0m2.543s  <-- Note this number. ~2.5 seconds.
user    0m0.015s
sys     0m0.009s
That 2.5 seconds is purely connection overhead. Let’s fix it.
Step 2: Create the Socket Directory
SSH needs a place to store the Unix socket files (the “pipes” that connect your terminals). Let’s create a dedicated folder to keep things tidy.
See also: Mastering the Linux Command Line — Your Complete Free Training Guide
Run:
mkdir -p ~/.ssh/sockets
chmod 700 ~/.ssh/sockets
mkdir -p: Creates the directory if it doesn’t exist.chmod 700: Restricts permissions so only you can read/write to this folder. This is critical for SSH security.
Step 3: Configure ~/.ssh/config
Now we tell the SSH client to use that directory.
Action: Open your config file in your preferred editor:
nano ~/.ssh/config
Add this configuration: Paste this block at the top of the file:
Host *
    # Enable multiplexing: automatically check for an existing master connection
    ControlMaster auto

    # Define where the socket file lives
    # %r=remote_user, %h=remote_host, %p=remote_port
    ControlPath ~/.ssh/sockets/%r@%h-%p

    # Keep the Master connection alive in the background for 10 minutes
    # after you disconnect.
    ControlPersist 10m
Press Ctrl + O to save, and Ctrl + X to exit.
Step 4: Initialize the Master Connection
The configuration is ready, but we need to trigger it once to create the Master Socket.
Run:
ssh [email protected]
Log in as usual, then type exit to disconnect.
What just happened? Because we set ControlPersist 10m, SSH didn’t actually close the TCP connection when you typed exit. It went into the background. You can verify this by checking your sockets folder:
ls -l ~/.ssh/sockets/
You should see a file there. That file is your active tunnel.
Step 5: Verify the Speed (The “Magic” Moment)
Now that the tunnel is established, let’s run our benchmark again.
Run:
time ssh [email protected] exit
Check the output:
real    0m0.015s  <-- Look at that difference!
user    0m0.005s
sys     0m0.006s
Result: The connection time dropped from ~2.5s to 0.015s. You can now open ten new terminal tabs to this server, and they will all connect instantly without asking for a password.
Managing Your Connections
Since you now have background processes handling your connections, you might need to control them manually from time to time.
1. Check Connection Status
Want to know if a Master connection is currently active for a specific host?
ssh -O check [email protected]
Output: Master running (pid=45321)
2. Force Close a Connection
If the network hangs or you change your port forwarding settings, you need to kill the old tunnel so a new one can be created.
ssh -O stop [email protected]
Output: Stop listening request sent.
Troubleshooting Common Issues
Here are two common hiccups you might encounter:
- “ControlPath too long” Unix sockets have a strict character limit on file paths (usually around 104 characters). If you have a deep directory structure or very long hostnames, SSH will fail.
- Fix: Change your
ControlPathto a shorter location, like/tmp/ssh-%r@%h:%p.
- Fix: Change your
- “Bad owner or permissions” SSH will refuse to use a socket directory if it thinks others can access it.
- Fix: Ensure you ran
chmod 700 ~/.ssh/socketsin Step 2.
- Fix: Ensure you ran
Summary
Congratulations! You have successfully optimized your workflow.
- Before: SSH = Handshake + Key Exchange + Auth + Latency.
- After: First SSH = Setup; Subsequent SSH = Instant Access.
Enjoy your blazing fast terminal experience!