A connection timeout means that the client attempted to establish a network socket to the SSH server, but the server failed to respond within the timeout period.
ssh: connect to host 203.0.113.0 port 22: Connection timed out
In PuTTY, you might see an error window with text like this:
Network error: Connection timed out
In this article, we will dive into this issue and see how to troubleshoot this error:
Table of Contents
Check SSH command syntax
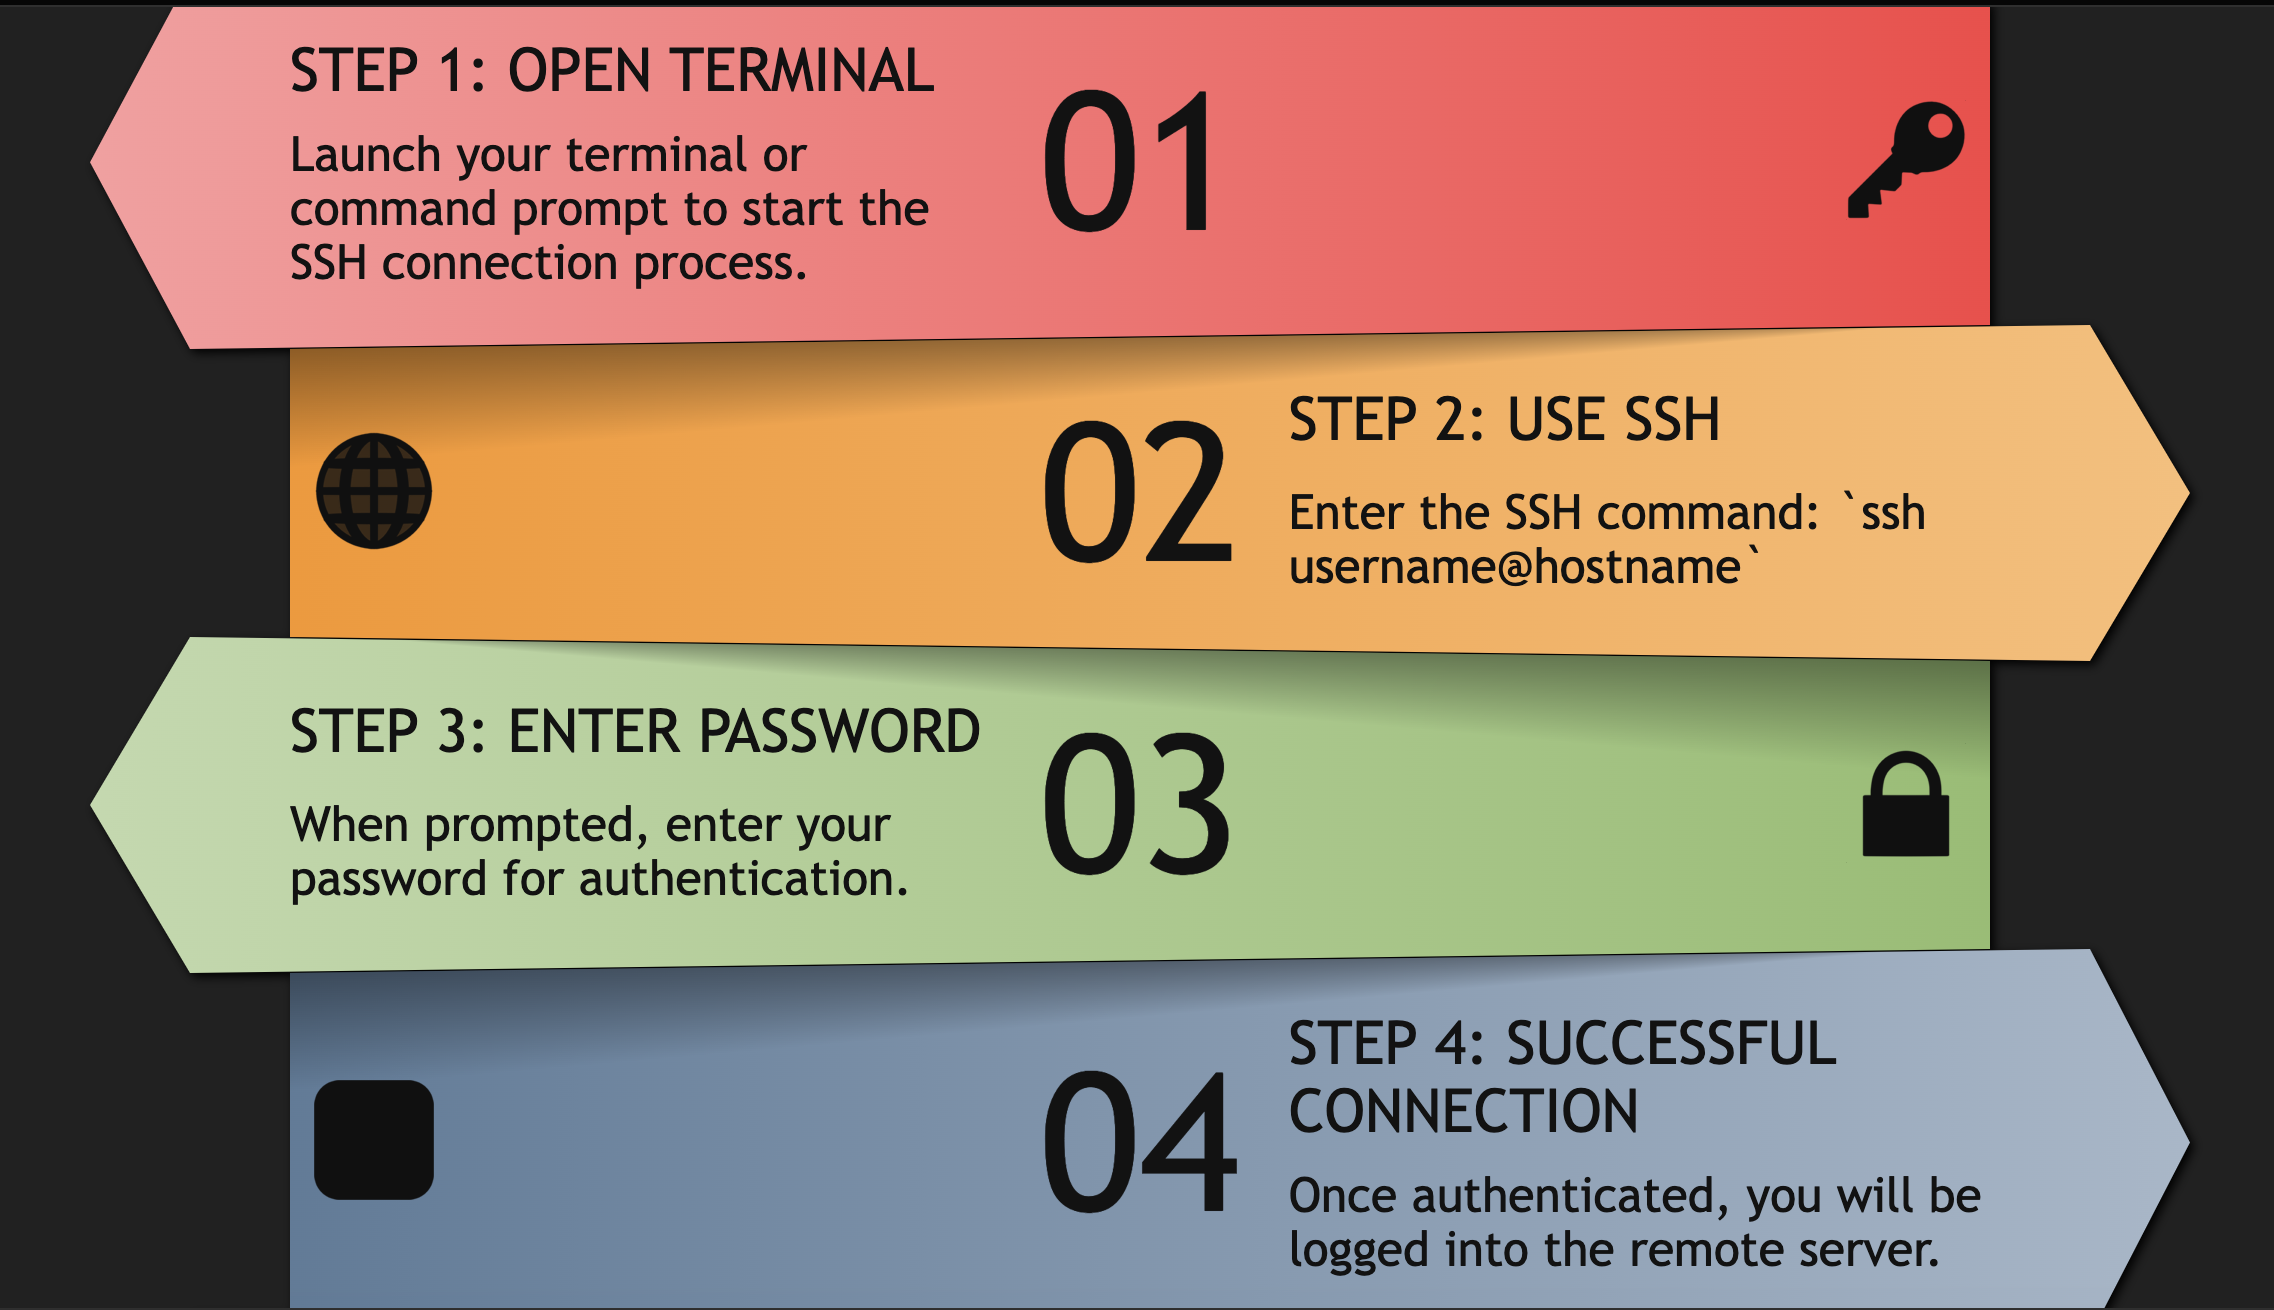
The syntax for the SSH command is as follows:
ssh [options] [user@]hostname [command]
Here is a brief explanation of each part of the syntax:
- ssh – This is the command to initiate the SSH connection.
- [options] – This is an optional parameter that allows you to specify additional options to configure the SSH connection. For example, you can use the -p option to specify a non-standard SSH port.
- [user@]hostname – This is the remote host that you want to connect to. You can optionally specify a username to use for the SSH connection. If you omit the username, the default username for your current session will be used.
- [command] – This is an optional parameter that allows you to specify a command to run on the remote host after the SSH connection is established. If you omit this parameter, you will be dropped into an interactive shell on the remote host.
See also: Mastering the Linux Command Line — Your Complete Free Training Guide
Here is an example of how to use the SSH command to connect to a remote host:
This will initiate an SSH connection to the host example.com using the username username.
If you have already set up SSH keys, you will be logged in without being prompted for a password. If not, you will be prompted to enter your password.
Enable verbose output in SSH command
The ssh -vvv command is used to establish an SSH connection to a remote server with verbose output enabled. The -v flag stands for “verbose,” and it can be used up to three times in a row (i.e., -v, -vv, -vvv) to increase the level of detail in the output. Here’s what each level of verbosity provides:
- -v: Verbose mode, displays debug messages about the authentication process and other connection details.
- -vv: Provides additional debug information and more details about the connection process.
- -vvv: Provides the most detailed output, including debugging information about the SSH handshake and messages exchanged during the connection process.
Using the -vvv flag is helpful when troubleshooting SSH connection issues, as it provides a wealth of information that can help pinpoint the problem.
However, keep in mind that the output can be quite verbose and overwhelming, so it’s usually best to start with the -v or -vv flags and work your way up to -vvv if needed.
Confirm that the server is correct
To confirm that the server’s IP address is correct, you can use ping command and follow these steps:
Identify the server that you want to connect to. This could be a domain name, a hostname, or an IP address.
Open a command prompt or terminal window on your local machine.
Type the following command, replacing server_address with the domain name, hostname, or IP address of the server:
ping server_address
This will send a small packet of data to the server and wait for a response. If the hostname is resolvable, you should see a series of responses.
Look at the IP address displayed in the ping results to confirm that it matches the expected IP address for the server.
If the hostname is not resolvable, you will see a message indicating that the hostname could not be resolved.
In this case, you may need to check your DNS settings or use a different hostname or IP address to connect to the server.
Check that the network allows SSH traffic over the port being used.
Some public networks may block port 22 or custom SSH ports.To check if the network allows SSH traffic over the port being used, you can follow these steps:
Identify the port number being used for SSH on the server. The default port number for SSH is 22, but some servers may use a custom port number.
Open a command prompt or terminal window on your local machine.
Type the following command, replacing port_number with the port number being used for SSH:
telnet server_address port_number
This will attempt to establish a connection to the server using the Telnet protocol on the specified port. If the network allows SSH traffic on this port, you should see a message indicating that the connection was successful.
If the network does not allow SSH traffic on this port, you will see a message indicating that the connection could not be established.
If the network is blocking SSH traffic on the port being used, you may need to use a different port number for SSH, or configure the network to allow SSH traffic on the current port.
For example, to check if the SSH port (port 22) is open on a remote server with the IP address 192.168.1.1, you can use the following command:
telnet 192.168.1.1 22
If the port is open, you will see something like this:
Trying 192.168.1.1...

Connected to 192.168.1.1.

Escape character is '^]'.

Press CTRL + ] and then type quit to exit.
If the port is not open, you will see an error message like this:
Trying 192.168.1.1...

telnet: Unable to connect to remote host: Connection refused
Verify the firewall rules on both the client and server
Identify the firewall software that is running on both the client and server machines. Common firewall software includes iptables on Linux and Windows Firewall on Windows.
Check the firewall rules on both the client and server to ensure that they are not set to DROP traffic by default. If the default policy is set to DROP, incoming traffic will be blocked by default and will need to be explicitly allowed.
Check that the SSH port is permitted for incoming connections. By default, SSH uses port 22, but some servers may use a custom port number.
On Linux machines with iptables, you can use the following command to list the current firewall rules:
sudo iptables -L
On Windows machines, you can use the Windows Firewall with Advanced Security console to view and manage firewall rules.
Look for a rule that allows incoming traffic on the SSH port. If such a rule exists, the SSH port is permitted for incoming connections. If there is no such rule, you may need to create a new rule to allow incoming traffic on the SSH port.
On Linux machines with iptables, you can use the following command to add a new rule to allow incoming traffic on the SSH port:
sudo iptables -A INPUT -p tcp --dport ssh -j ACCEPT
This command adds a new rule to the INPUT chain of the iptables firewall to accept incoming traffic on the SSH port. The -p tcp option specifies that the rule applies to TCP traffic, and the –dport ssh option specifies the destination port as the SSH port (port 22 by default). Finally, the -j ACCEPT option tells iptables to accept incoming traffic that matches the specified rule.
Note that this command only adds the new rule temporarily and will be lost when the system is rebooted. To make the rule persistent, you will need to save the iptables configuration. This can be done using the following command:
sudo iptables-save > /etc/sysconfig/iptables
This command saves the current iptables configuration to the /etc/sysconfig/iptables file, which is read at boot time to restore the firewall rules.
Increase the timeout value for the SSH command
To increase the timeout value for the SSH command, you can use the -o option with the ServerAliveInterval parameter. This option sets the time interval (in seconds) between sending packets to the server to request a response and keep the connection alive.
For example, to set the timeout value to 120 seconds (2 minutes), you can use the following command:
ssh -o ServerAliveInterval=120 username@hostname
This will send a packet every 120 seconds to the server to keep the connection alive. If the server does not respond to any of these packets within the specified interval, the connection will be closed and the SSH command will time out.


Thanks for the detailed steps. I got my problem solved.
I fixed this issue with your guide. Using the ‘telnet’ command, I tested connectivity over port 22, which revealed that the port wasn’t responding.
I checked my system’s firewall settings and discovered outgoing connections on port 22 were blocked. After adjusting my firewall settings to allow SSH connections through port 22, I was able to establish the SSH connection successfully.